What Are the Different Types of Solar Panel Connectors?
- Walid
- Apr 22
- 8 min read
If you’re researching Solar Panel Connectors and you see “String Harness” with families like Series Y, Series T, Series X, and BLA, the practical answer is this:
You choose the right solar connector by matching the string harness family to the required mating connector type, PV cable (AWG) range, polarity/locking behavior, electrical ratings, and waterproof sealing design.
A “compatible-looking” connector is not enough—most field issues come from mismatched wire range, improper crimping, or sealing/contact problems.

Key Takeaways
String harness connector families (Series Y/T/X/BLA) are not interchangeable unless mating and termination specs match.
Compatibility is decided by connector family + PV wire size (AWG) + polarity/locking mechanism + datasheet electrical ratings + sealing/weatherproof design.
Solar connector crimping quality is critical for preventing contact resistance / hot spots.
For outdoor reliability, prioritize waterproof solar connectors, rubber sealing ring performance, and UV resistance.
If a connector is damaged or overheating is suspected, prefer replacing the connector/harness with correct parts rather than improvised repairs.
Quick Answer: How to Choose the Right Solar Panel Connectors
Use this order-of-operations:
Identify the string harness family you have (Series Y, Series T, Series X, or BLA).
Confirm the mating connector type at the interface (often MC4-style in many markets, but you must verify on the harness spec).
Match the PV cable / PV wire size (AWG) to the connector’s approved termination range.
Verify polarity (positive and negative polarity) and that the locking mechanism/latch engages fully.
Confirm electrical and environmental requirements: voltage rating, waterproofing, and UV resistance.
Use the correct solar connector tools and follow the approved solar connector crimping steps.
What a “String Harness” Means in Solar Panel Wiring
A string harness is a pre-assembled cable set used in PV systems to route module output from one side of the system to the next—commonly from module/junction points toward a combiner, inverter input, or junction box.
Where string harnesses fit (module output to combiner/J-box)
In many systems, you’ll see harnesses connecting:
module terminals to
string cables / junctions, and ultimately to
system-side components (combiner boxes, inverters, or disconnects).
Because harnesses bundle connectors and cable segments together, their “connector family” decisions are baked into the assembly. That’s why the harness family you select matters as much as the connector itself.
Why harness family matters for connector matching
Generic connector lists (“MC4 vs MC3” etc.) don’t always help you when your actual part is a harness. With harnesses, you need to align:
the connector type that will mate,
the PV cable type used on the harness,
the termination/crimp method expected by the connector,
and the sealing design for outdoor conditions.
Solar Connector Types You’ll Encounter in String Harnesses
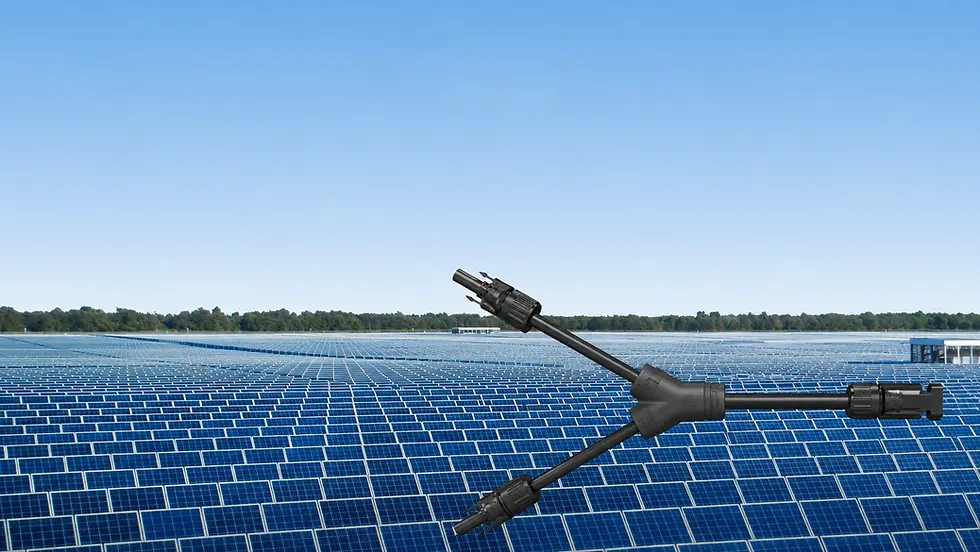
MC4 connectors and MC4-style PV connectors (what to verify)
In the field, MC4 connectors (and MC4-style equivalents) are widely seen in solar panel wiring connectors because they’re field-terminatable and designed for secure locking.
But even with MC4 connectors, installers commonly get tripped up by:
using connectors from different families without verified fit,
crimping to an incorrect PV wire size (AWG),
or missing/incorrect sealing components.
Practical guidance: If your harness claims MC4 compatibility, still verify:
latch engagement,
proper conductor fit,
and sealing compression after assembly.
Other PV connectors and wiring connectors (why “looks similar” isn’t enough)
You may also encounter PV connectors from different connector ecosystems with:
different latch geometry,
different contact designs,
and different sealing depth/compression requirements.
A “similar body shape” doesn’t guarantee:
full mating,
correct compression,
or the same internal contact performance.
This is a key reason your article should focus on compatibility checks, not visual similarity.
Adapters: when you can use them (and when you shouldn’t)
Solar connector adapters can help when you’re bridging different connector families—but only when:
electrical ratings match,
mechanical mating is correct,
and the adapter’s sealing design works for outdoor conditions.
String Harness Connector Families (Series Y, Series T, Series X, BLA)
Based on your image, you have a product category labeled String Harness, with families:
SERIES Y
SERIES T
SERIES X
BLA SERIES
Because the image doesn’t list electrical or dimensional specs, the most reliable way to write for readers is to explain what to confirm for compatibility when choosing among these series—rather than inventing specifics.

Series Y
When you’re matching Series Y string harness connectors, confirm:
Mating connector type at both ends (what it locks with)
PV cable / PV wire size (AWG) allowed for terminations
polarity (positive and negative polarity) orientation
any required UV resistance and outdoor sealing approach
If you’re replacing an existing harness, use the original harness family as your starting point, then verify mating connector type and wire range.

Series T
For Series T, verify:
connector family compatibility (mating and latch behavior)
conductor range for the termination (PV wire size/AWG)
sealing and environmental rating approach (waterproof solar connectors expectations)

Series X
For Series X, focus on:
correct mating connector family and locking mechanism/latch behavior
termination quality requirements tied to the connector design
whether the harness uses a sealing method that depends on correct crimp/assembly position
cable jacket suitability for outdoor runs (UV exposure assumptions—UV resistance expectations should come from the datasheet)
BLA Series
For BLA Series, treat it as a separate connector/harness family:
confirm mating connector type (don’t assume it’s identical to other series)
verify PV cable compatibility (PV wire size/AWG)
check waterproof/sealing design details (rubber sealing ring presence or equivalent sealing features)
verify electrical ratings on the specific harness model (voltage rating, current rating, etc.)—use datasheets rather than general assumptions
How to select between series without guesswork
Here’s a simple selection framework you can apply immediately:
Replacement scenario: Match the existing harness family (Y/T/X/BLA) first.
New design scenario: Select the series based on the required mating connector ecosystem and approved cable routing.
Termination scenario: Ensure your installers have the correct solar connector tools for that specific connector type.
Weather scenario: Confirm waterproofing/sealing design for outdoor exposure.
Compatibility Checklist
Use this checklist before you commit to connector or harness replacements.
1) Polarity and the locking mechanism / latch
Confirm which side is positive and negative polarity.
Ensure the locking mechanism / latch fully engages.
After assembly, the connection should not feel “loose” or partially seated.
Why it matters: A partially engaged latch increases contact resistance and can lead to overheating.
2) PV wire size (AWG) and connector termination limits
This is one of the highest-risk mistakes.
Check the connector’s approved PV wire size (AWG) range.
Confirm the installer is stripping to the correct length.
Use the right crimp die/tool for that connector design.
If the connector is designed for a specific wire range and you crimp outside it, the contact interface can be compromised—raising contact resistance / hot spot risk.
3) Voltage rating explained
Every connector has electrical ratings that apply when installed correctly.
When readers ask about “voltage rating explained,” the correct answer is:
Use the connector’s datasheet for rated voltage/current, and align it with your PV system design.
Confirm the rating applies to the termination method you’re using.
4) Waterproof sealing ring, UV resistance, and outdoor durability
For outdoor installations, a “waterproof solar connector” must include:
a reliable sealing component (often a rubber sealing ring),
compression achieved when assembled correctly,
and connector material suited for UV resistance over time.
When inspecting an installed harness, look for:
cracks or deformation at the seal,
improper seating,
or visible gaps around the cable entry.
5) Contact resistance / hot spot prevention
Hot spots are typically caused by increased contact resistance, which comes from:
incomplete mating,
poor crimp quality,
wrong wire range,
damaged terminals,
or moisture ingress.
Your prevention approach should be mechanical and electrical:
correct connector family mating,
correct crimping,
correct sealing compression,
and post-assembly verification.
How to Crimp and Terminate Solar Connectors Correctly
This section targets the intent behind solar connector crimping searches: people want “how-to,” but you also want reliability outcomes.
Tools you’ll need (solar connector tools)
Correct stripping tool for PV cable
The correct crimp tool (and die) for your connector model
Connector halves (male/female) and any sealing components
A way to confirm assembly (visual check and a gentle mechanical pull test—within safe/installer guidance)
Step-by-step: solar connector crimping essentials (MC4-style pattern)
Even if your harness series isn’t MC4 specifically, most reputable solar connectors follow a similar termination logic:
Cut and strip the PV cable to the exact stripping length required by the connector.
Inspect the conductor for broken strands, nicks, or oxidation.
Insert the conductor into the terminal barrel fully and correctly.
Crimp using the correct die and complete the crimp cycle.
Verify crimp quality:
no conductor strands outside the barrel,
no insulation pulled into the conductor crimp zone,
sealing portion (if present) seated for compression.
Assemble and lock the connector halves.
Confirm polarity and that the latch locks fully.
Perform a gentle pull test to verify mechanical security
Solar Connector Crimping Checklist
Correct PV wire size (AWG) for the connector’s terminal range
Stripped to correct length (no exposed copper beyond what’s intended)
Crimp tool/die matches the connector model
Crimp shows correct compression (no gaps, no loose conductor)
Connector latch fully engages after assembly
Seal sits correctly to support waterproof solar connectors performance
How to Replace a Broken Solar Panel Connector
Searchers frequently ask: how to replace a broken solar panel connector. In practice, you’ll often replace at the harness level because:
the sealing design depends on correct assembly,
crimp quality is critical,
and the harness includes pre-validated routing/polarity labeling.
When to replace the connector vs the full harness
Replace only the connector when:
damage is limited and the original harness remains intact,
you can match the exact connector family and termination specs,
you can restore waterproof sealing properly.
Replace the full harness when:
the cable insulation is compromised,
connectors are repeatedly failing,
you’re uncertain about crimp history,
sealing is damaged or contaminated.
Replacement steps that protect sealing and contact quality
Identify the harness family (Series Y/T/X/BLA) and the mating connector type.
Confirm PV wire size (AWG) and conductor type for the termination.
Ensure correct positive and negative polarity alignment.
Use correct solar connector crimping tools/dies.
Reassemble and confirm the locking mechanism/latch engagement.
Inspect sealing compression and verify no gaps at the cable entry.
After install, visually confirm alignment and cable strain relief routing.
Overheating Causes and Fixes
If a connector overheats, treat it as a system warning, not just a cosmetic issue.
Common causes you can check
Loose connection or incomplete latch engagement
Wrong PV wire size (AWG) vs connector termination range
Incorrect crimp die/tool causing improper contact pressure
Damaged or missing sealing component (rubber sealing ring issues)
Moisture ingress leading to corrosion and increased contact resistance
Fix approach
Do not “tighten and hope.”
Inspect termination quality and re-crimp/replace the connector/harness using correct specs.
Verify sealing and UV resistance suitability for outdoor exposure.
Decision Guide: Which Solar Panel Connectors Are Best for Your String Wiring?
Here’s the most reliable decision logic:
If you already have a working system: match the existing harness family and confirm mating type + wire/AWG range.
If you’re building a new string: select connector/harness series based on:
required mating connector ecosystem,
the PV cable you’ll run (PV wire size/AWG),
and the outdoor sealing expectations (waterproof connectors + UV resistance).
If reliability matters: prioritize correct termination (solar connector crimping) and hot spot prevention (contact resistance control) over “price-only” choices.
Conclusion
The “different types of solar panel connectors” story is not just about naming connector brands. In real installations, what matters is whether your string harness connector family (like Series Y, Series T, Series X, and BLA) matches your system requirements for mating compatibility, PV cable/AWG fit, positive and negative polarity, sealing/waterproof performance, and electrical ratings.
When you choose correctly and terminate with proper solar connector crimping practices (supported by the right solar connector tools), you reduce the most common failure drivers—especially contact resistance / hot spot risks.
FAQ
1) Are solar panel connectors interchangeable across Series Y, Series T, Series X, and BLA?
Not by assumption. Even if they look similar, compatibility depends on mating connector type, polarity/locking mechanism, PV wire size (AWG) termination range, and sealing design. Always match the harness family and verify the datasheet specs.
2) What PV wire size (AWG) fits solar panel connectors like MC4 connectors?
Each connector model has an approved PV wire size (AWG) range for termination. You must check the connector’s installation guide/datasheet and confirm the cable’s conductor size matches that range.
3) How do I know my solar connector is crimped correctly?
A correct crimp depends on using the correct solar connector tools/die for the connector model and stripping to the specified length. Verify conductor placement, crimp compression quality, and that the latch engages fully after assembly.
4) Why do solar connectors overheat?
Overheating often comes from increased contact resistance due to poor crimp quality, incomplete latch engagement, wrong PV wire size (AWG), damaged terminals, or moisture ingress that compromises sealing.
5) What makes a solar connector “waterproof” for outdoor use?
Waterproof performance depends on sealing design (often including a rubber sealing ring), correct compression when assembled, and connector material suited for UV resistance and temperature cycling. Confirm these features in the connector/harness documentation.

Comments